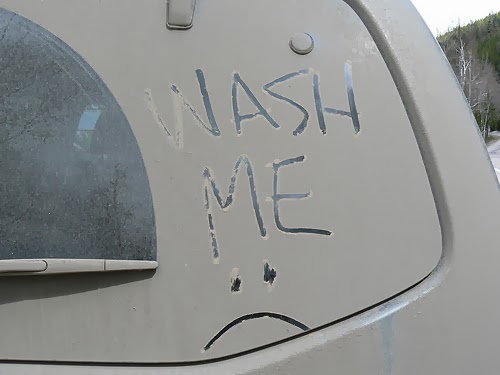
Go off-roading last weekend? Or perhaps you've noticed all of that road salt accumulating all over your car? Or maybe you just like the sight of a freshly waxed vehicle? It doesn't matter which is the case, the reality of the situation is simple: You need a car wash!
Now, you could take it to an automatic wash-- it's certainly the most convenient option. But brushed automatic washes can scratch your paint, and touchless washes have a tough time getting all of the grime off of your car. Hand washing is the more time-consuming option, but the results are thorough and can be in a league of their own. So, what's the best way to hand wash your car? Let's start with the basics!
Step 1: Choose the right tools
First Never wash in direct sunlight. Pick a shady spot. Second it’s very important to choose tools that are gentle on the paint, yet still effective at removing contamination. As a rule of thumb, sponges and mitts that are plush or have a deep nap are better than flat weave towels or dense sponges. For example, a natural sea sponge has numerous deep compartments where dirt and debris can accumulate. The natural fibers themselves will not scratch the paint and they will essentially pull contamination into the sponge’s openings, away from the paint. Always use the softer side of the sponge for washing. Rinse new sea sponges thoroughly before use to remove any shell fragments or sand.
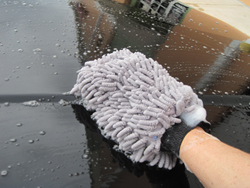 Another option is a sheepskin wash mitt.
Sheepskin is extremely soft and plush. The fibers are gentle on the
paint while the nap is deep enough to accommodate loose dirt and sand so
they do not rub against the vehicle. Because wool is natural, it does
not last as long as a Microfiber mitt. However, for luxurious softness, you can’t beat the texture of wool.
Another option is a sheepskin wash mitt.
Sheepskin is extremely soft and plush. The fibers are gentle on the
paint while the nap is deep enough to accommodate loose dirt and sand so
they do not rub against the vehicle. Because wool is natural, it does
not last as long as a Microfiber mitt. However, for luxurious softness, you can’t beat the texture of wool.Step 2: Start washing!
1. Some folks like to clean their wheels first as to prevent the excessive grime that builds up on your tires and in your rims from spraying up onto your paint while you're scrubbing them. Others like to wait until the end to avoid getting the wheels dirty (again) with dirt being rinsed off of your car. Either way works.
2. Now you’re ready to wash the car itself. It’s important to use a car wash that is rich in lubricants. The purpose of the car wash is to remove contaminants and lubricate them so they do not scratch the paint as they slide off the vehicle. Dish detergents are not ideal because they remove protective coatings.
3. How do you prevent swirl marks? Use two buckets. Fill one bucket with soapy water and fill the other with clean water. Each time you’re ready to reload your sponge with soapy water, dip it in the clean water first, to rinse out the grit and contamination you’ve just removed from your vehicle. Then dip it in the soapy water and continue washing.
 4.
Always rinse your vehicle thoroughly before you begin washing in order
to remove loose debris. Then begin washing at the top of the vehicle.
Wash down the vehicle as opposed to front to back. Remember that the
lower panels are dirtiest. You want to clean the windows and the upper
panels before cleaning the lower half of the vehicle so that you don’t
transfer grit to the top half of the vehicle. Rinse and reload your
Sponge often to prevent cross-contamination. Rinse your vehicle
frequently as you work, especially in hot weather.
4.
Always rinse your vehicle thoroughly before you begin washing in order
to remove loose debris. Then begin washing at the top of the vehicle.
Wash down the vehicle as opposed to front to back. Remember that the
lower panels are dirtiest. You want to clean the windows and the upper
panels before cleaning the lower half of the vehicle so that you don’t
transfer grit to the top half of the vehicle. Rinse and reload your
Sponge often to prevent cross-contamination. Rinse your vehicle
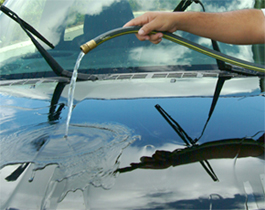
frequently as you work, especially in hot weather.5. When rinsing, you don’t have to blast your car clean with the water hose. Free-flowing water (no nozzle) will allow the water to sheet off of your vehicle for a more thorough rinsing.
Step 3: Drying your car
Never skip drying! Drying your vehicle after washing is necessary to prevent water spots. Water spots are caused by mineral deposits that etch the outline of a drop of water into your vehicle’s paint. All water has minerals, whether it’s from the hose or the sky. As the water evaporates, the minerals remain on the surface and they will eventually, invariably create water spots.
Your tool of choice for drying should be a "jelly blade", a chamois, or a detailing vacuum. We'll just assume you're using the blade or the chamois.
1. Dry the windows and mirrors first. A series of careful firm strokes with your chamois will remove any remaining water.
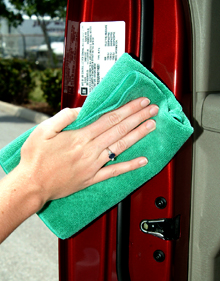
2. Once the outside is dry, wipe down all your door jambs. Open the trunk and hood to wipe the jambs.
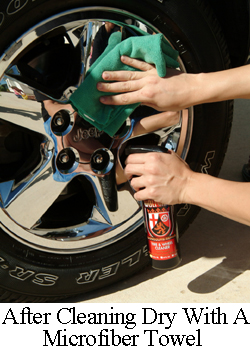
3. Dry your wheels using a towel or chamois that is designated just for this purpose. Don’t use this towel on your paint to avoid cross-contamination. You may also use this towel to wipe off surfaces under the hood. Wash this towel before you use it again.
Step 4: Apply wax or sealant
This one is easy but varies widely depending on each product. The general idea, though, is to use a spray wax or spray sealant to rejuvenate the shine of your existing wax. Skip this step if you are going to apply another coat of wax.
No comments:
Post a Comment